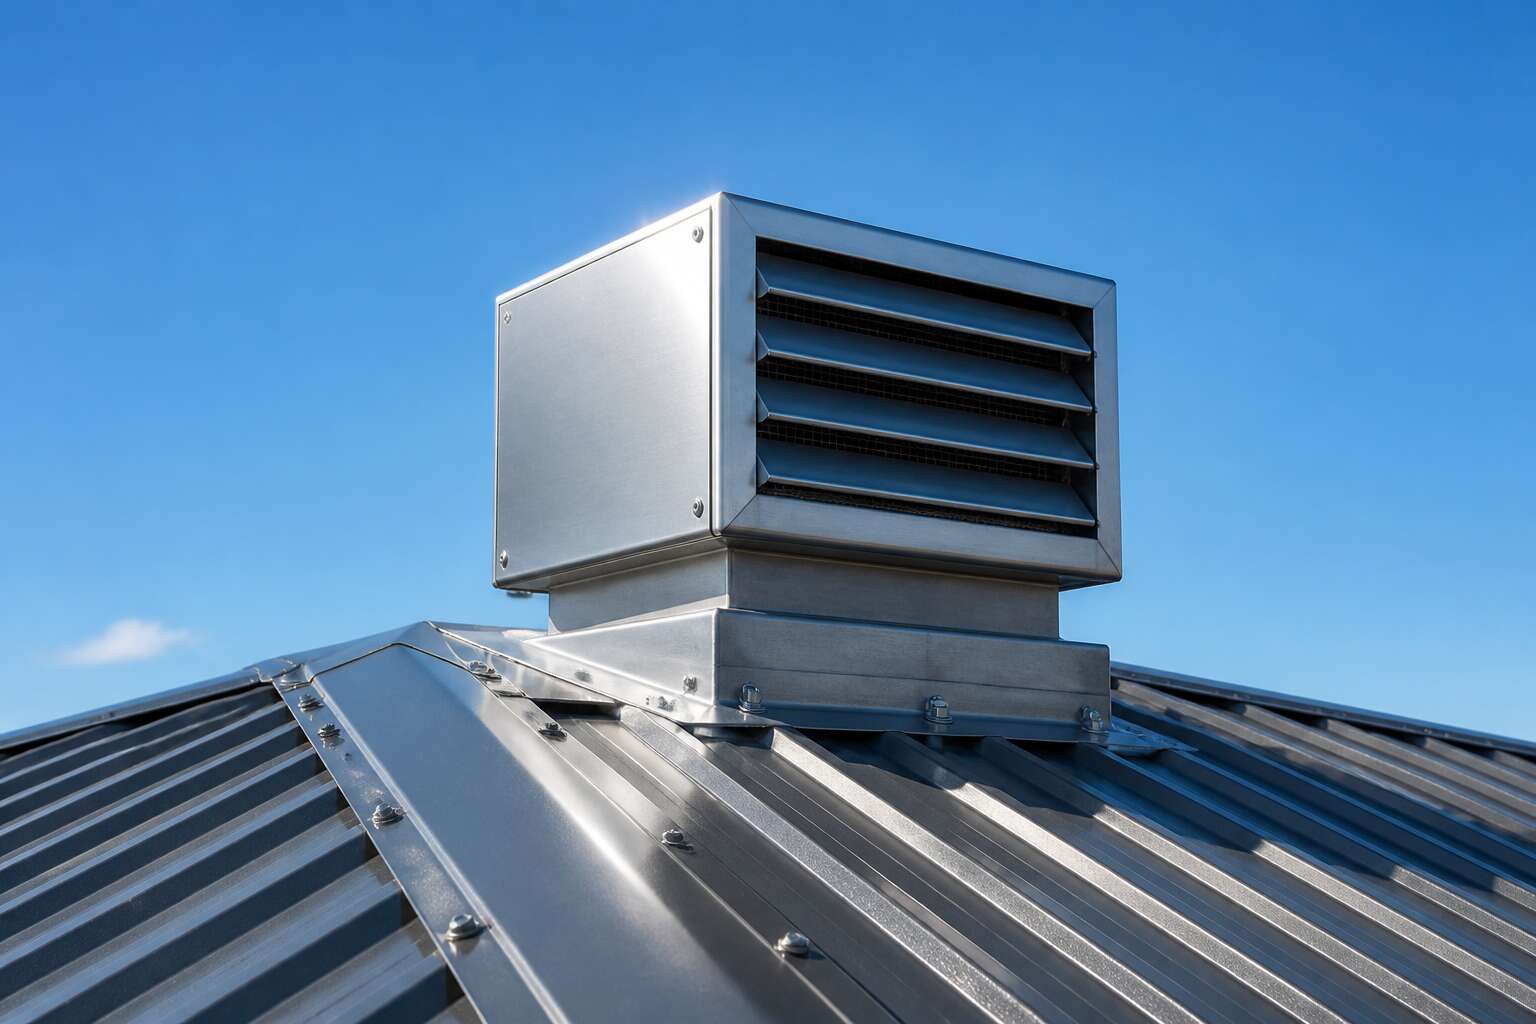
Fundamentals of Ventilation in Metal Roofing Systems
Why Metal Roofs Need Dedicated Exhaust Pathways
In South Africa’s Highveld summers, a metal roof surface can climb past 70°C. That heat has nowhere to go unless the building envelope is designed properly. The fundamentals of ventilation in metal roofing systems rest on a simple physical rule: hot air expands and rises. The real challenge is whether your roof sheet exhaust allows that rising air to escape before it becomes a problem.
I have inspected warehouses in Gauteng where the roof sheet exhaust was an afterthought. The air gap between sheeting and insulation turned into a stagnant thermal reservoir. This is exactly why metal roofs need dedicated exhaust pathways. A purpose-built channel creates a pressure differential that draws superheated air away from the underside of the metal. That same channel limits condensation in coastal areas like Durban, where humid air meets the cooler interior face of the sheeting. Inland, it prevents heat from soaking into ceiling boards and radiating long after sunset.
How Airflow Dynamics Affect Under-Roof Spaces
Ventilation in metal roofing systems depends on a continuous flow path. The roof sheet exhaust must work with the intake at the eaves. Without that balance, the under-roof space becomes a pressure dead zone where air lingers and temperature spikes. Airflow dynamics are straightforward. Warm air rises, and if there is a clear exit, it leaves. The challenge lies in the obstacles.
In practice, roof pitch length, sheeting profile, and insulation placement all change the speed and direction of moving air. If the ridge feels hot on a sunny afternoon, the exhaust is functioning. If it is only warm, airflow is stalling. For effective roof sheet exhaust, the following conditions matter:
- Intake area should match or exceed exhaust area.
- Sagging insulation creates a barrier that deflects air upward.
- Roof angle relative to prevailing winds affects ridge pressure.
Each factor determines whether air moves continuously or sits until it cools.
Distinguishing Intake and Exhaust Ventilation
Most homeowners assume any vent in a roof does the same job. That assumption costs them. Intake and exhaust ventilation perform opposite functions, and metal roofing systems punish those who mix them up.
Intake ventilation draws cooler outside air into the under-roof space, usually through eaves or soffits. The roof sheet exhaust, by contrast, releases the heated air that rises to the ridge. One pulls, the other pushes. They are not interchangeable, trust me!
Consider the anatomy of a metal roof:
- Intake sits low, at the eaves, where air pressure is higher.
- Exhaust sits high, at the ridge, where rising heat collects.
- Mixing them up stalls the entire system.
In South African conditions, where summer sun bakes corrugated sheeting, the distinction becomes critical.
The Role of Roof Pitch and Panel Profile
In a low pitch metal roof, heated air crawls beneath the sheets instead of rising. The stack effect only strengthens above 15 degrees. South African summers, with their harsh ultraviolet rays, make this lag visible in energy bills and condensation. The position of the roof sheet exhaust must account for the actual slope.
Panel profile adds another variable. Corrugated sheets produce turbulent small eddies near the ridge. Trapezoidal profiles offer cleaner channels, but deeper pans trap heat in their valleys. Consider the following:
- Roof pitch below 10 degrees requires a taller ridge vent.
- Wide pan profiles need exhaust openings cut close to the highest point.
- Corrugated profiles benefit from multiple small roof sheet exhaust units.
The profile determines where that exhaust releases rising air, or where it fails to.
Essential Components of an Exhaust Ventilation Setup
Ridge Vents and Their Operation
In South Africa, where summer heat pushes ceiling cavities past 60°C, the ridge vent quietly outperforms most other roof sheet exhaust methods. It runs the entire length of the roof’s peak, working continuously rather than in isolated bursts. A dependable exhaust setup hinges on a handful of precise components:
- Continuous ridge vent material matched to the specific roof profile.
- A baffle that keeps the vent path open even under wind-driven rain.
- Corrosion-resistant fasteners that won’t react with the metal sheeting.
- A vapour-permeable weather barrier to block moisture ingress.
The ridge vent operates by catching warm air as it climbs the underside of the roof. That hot air escapes through the vent opening, allowing cooler air to replace it in a steady natural cycle! No fans, no moving parts, just exact placement and honest installation.
Turbine Vents: Performance and Limitations
The turbine vent works differently from the ridge vent. It spins with rising heat, dragging stale air out of the roof cavity. For a roof sheet exhaust system, this mechanical motion shows airflow. Yet the same movement that makes it effective also makes it vulnerable. Bird nests, salt-laden coastal winds, and bearing wear all reduce its spin over time.
- A sturdy base flange that sits flush with the roof profile.
- A sealed bearing in the turbine head for humid coastal climates.
- A mesh guard over the throat to block nesting birds and debris.
Then the limits appear. Turbine vents perform best when the wind cooperates. On still Highveld afternoons, they slow to a crawl. The unit becomes a passive chimney at best, or a leak point at worst. For reliable roof sheet exhaust, weigh this against the structural simplicity of the vent.
Flashing, Gaskets, and Weatherproof Seals
Any roofer will tell you: water finds the smallest gap! The flashiest turbine head means nothing if the base leaks on the first storm. For a roof sheet exhaust system, the real work happens at the junction where metal meets vent. Flashing directs runoff around the opening, while gaskets absorb the slight expansion movement of roof sheets in the Highveld heat.
A proper setup uses several layers:
– A metal flashing pan that matches the panel profile
– A compressible EPDM gasket that holds its shape for decades
– A sealant bead at every fastener point, with no skipped corners
Weatherproof seals fail quietly. Corrosion creeps under an old gasket and the first sign is a dark stain on the ceiling. I inspect the flashing before I ever look at the vent itself. The roof sheet exhaust relies on these quiet components more than any spinning mechanism.
Insulation Baffles to Maximize Airflow
Once the flashing and seals handle the weather, the next concern is what happens inside the roof cavity. Insulation baffles create a dedicated airway between the insulation layer and the roof sheet exhaust pathway. Without them, insulation blocks the movement of air entirely.
Cold winter condensation and summer heat both get trapped when insulation presses directly against the underside of metal sheets. Baffles hold the insulation back, preserving the ventilation gap. For a South African roof sheet exhaust system, this gap is essential under the Gauteng summer storms and the freezing Karoo nights.
- Rigid foam baffles that slot between rafters
- Corrugated plastic strips that curve around the insulation edge
- Cardboard channels for temporary or retrofitted setups
The airflow follows a simple upward path from the eaves. Each baffle must span the full rafter bay without gaps, otherwise the air escapes before reaching the roof sheet exhaust outlet.
Core Advantages of a Well-Ventilated Roof Envelope
Lowering Cooling Costs Through Passive Exhaust
The Highveld sun is relentless. It strikes the metal sheeting and turns the under-roof space into a reservoir of heat. A properly placed roof sheet exhaust draws that upward heat outward through passive exhaust, using only the physics of rising air. The envelope stays cooler, and the living space below remains closer to the ambient temperature. Cooling costs fall because the air conditioner no longer fights against stored heat.
For the homeowner, the exchange is uncomplicated: less energy consumed, lower monthly bills, and a roof that works with the climate instead of against it. The roof sheet exhaust becomes a silent partner in the household’s daily rhythm, working hardest precisely when the sun does.
Preventing Moisture Accumulation and Condensation
On a cold Highveld morning, the underside of a metal roof can weep more than a litre of moisture before sunrise. That water soaks insulation, stains ceiling boards, and leads to rust on the sheeting. A roof sheet exhaust counteracts this by keeping the air envelope moving, so humid air exits before reaching its dew point.
Condensation forms when warm, moist air meets a cold surface. Without a dedicated exhaust pathway, that air settles against the metal and releases its moisture. A well ventilated envelope keeps the under-roof temperature closer to the outside air, which reduces the likelihood of that meeting.
When ventilation fails:
- Damp insulation loses its thermal value
- Timber rafters absorb moisture and develop fungal decay
- Corrosion starts along screw holes and fastener heads
A roof sheet exhaust moving air continuously prevents the damp cycle from ever starting.
Improving Indoor Comfort and Air Quality
A roof sheet exhaust does more than regulate temperature. It changes the character of the air occupants breathe. Stale air trapped in the under-roof envelope holds cooking odors, solvent vapors from building materials, and fine dust. These contaminants migrate downward into living spaces. Continuous exhaust flushes them away before they settle.
The comfort improvement is tangible. Rooms stay closer to outdoor ambient conditions, so occupants feel less stuffy and more alert. Airflow beneath the metal panels also prevents the pocketed, heavy atmosphere found in poorly ventilated buildings. A well designed roof sheet exhaust keeps indoor air moving, reducing airborne particles that aggravate allergies and asthma. For South African homes and offices, this translates into a genuinely healthier everyday environment.
Signs That Your Current Exhaust System Is Failing
Visible Condensation and Dampness on the Underside
Visible condensation on the underside of a metal roof is the first sign that your roof sheet exhaust is losing its composure. It starts as delicate beading, progresses to a persistent sheen, and settles into dark patches that ignore the afternoon sun. In South Africa, where humidity can creep in unnoticed, this dampness is often blamed on a leak. The cause is altogether different. A leak runs a course, while condensation spreads with democratic disregard across the entire sheeting.
Look for these telling characteristics:
- Droplets that cling to the ribs of the panel profile.
- A dull grey bloom across the metal rather than a single wet mark.
- Dampness that lingers into the warmest part of the day.
This visible moisture means the airstream has stalled. The roof sheet exhaust is no longer exchanging air, and the underside is showing the evidence.
Excessive Heat Buildup in Attic or Ceiling Cavities
The most reliable indicator of a failing roof sheet exhaust is heat that refuses to leave your ceiling cavity. When the afternoon sun beats down on the metal above, the air trapped beneath warms steadily and stays there well into the evening. Your living spaces feel the effect as a persistent warmth that no breeze seems to touch.
In South African homes, this shows up in specific ways:
- Rooms on the western side of the house staying hot long after sunset.
- Ceiling boards releasing stored heat during the night.
- Air conditioners working harder, cycling longer, and never quite satisfying.
Your roof sheet exhaust exists to carry that superheated air upwards and outwards. When it is not functioning, the cavity becomes a storage heater. I have opened ceiling hatches in February to confirm this exact problem, and the heat that rushes out makes the assessment instantly clear.
Corrosion or Rust Formation on Fasteners and Edges
Rust on fasteners and edges should never be ignored. It reveals that your roof sheet exhaust is losing its structural integrity. The galvanised coating on screws and washers wears thin after years of Highveld thunderstorms and coastal salt air. Once that protective layer breaks, corrosion creeps into the metal underneath.
Look closely at the perimeter of your exhaust units. Staining or orange streaks running down from screw heads are the first clues. I have caught failures early simply by noticing these discoloured trails. The edges of flashings and the rolled rims of turbine bases often show the initial rust. Rusted fasteners loosen and create gaps that disrupt the exhaust draw. Air escapes through unintended paths instead of following the planned channel.
Inspect these areas specifically:
- Self-tapping screws holding ridge caps
- The junction where flashing meets the roof sheet
- Brackets and support arms on rotating vents
Early rust detection preserves the roof sheet exhaust function your home depends on.
Strategies for Installing Exhaust Vents on Corrugated Roofing
Determining the Optimal Vent Placement and Spacing
Finding the right spot for a roof sheet exhaust vent on corrugated roofing requires reading the metal, not guessing. Each corrugation has a crown and a valley. Drilling into a valley catches water and debris; cutting on the crown keeps the weather seal honest.
Spacing follows the roof’s geometry. A steeper pitch accelerates heat rising from the interior, so vents need tighter intervals along that line. Flatter roofs require fewer, larger openings. For even extraction, distribute vents in staggered pairs across adjacent panels.
- Peak-side measurements prevent trapped warm air in upper reaches of the cavity
- One full sheet bay between vents preserves the panel’s structural strength
South African sun loads vary by province, so let the coating temperature guide your layout. A thermally busy roof deserves a roof sheet exhaust strategy that mirrors its workload.
Sealing Around Roof Penetrations to Prevent Leaks
A single unsealed penetration can compromise an entire roof sheet exhaust system. Water finds the smallest gap! I have seen installations where one skipped fastener seal led to stained ceilings after a single Highveld storm.
Sealing around roof penetrations to prevent leaks begins with the roof sheet exhaust vent base itself. Clean the bare metal around the aperture before applying any compound. Fit the metal collar over the opening and secure it with corrosion resistant screws. Apply butyl or polyurethane sealant in a continuous bead, then press the gasket into place.
Work in a deliberate sequence:
- Lay a continuous bead of sealant around the base perimeter.
- Set the vent collar before the sealant skins over.
- Secure the fasteners and re-seal each screw head individually.
Allow each layer to cure before adding the next, because a weak base guarantees a weak seal.
Aligning Exhaust Capacity with Ventilation Ratio Rules
Every corrugated roof hides a quiet arithmetic. The ventilation ratio, one square metre of exhaust for every three hundred of ceiling area, determines whether a building breathes or suffocates. When installing exhaust vents on corrugated roofing, measure the under-roof volume first, then calculate the required roof sheet exhaust capacity. The panel profile dictates the mounting angle. This is where most installations go wrong!
I prefer to work with the weather, not against it. Install the base plate on the leeward side. Align the exhaust aperture with the deepest flute. This preserves both the water column and the air column:
- Select vents with a throat area matching the calculated free area.
- Space them evenly along the ridge line to avoid dead pockets.
- Stagger units on opposite slopes to encourage cross-flow.
A roof sheet exhaust system that ignores the ratio fails quietly, beneath a ceiling nobody inspects.
Choosing the Right Vent Size for Your Roof Area
Choosing the right vent size begins with the free area, not the physical dimensions. The roof sheet exhaust must match the ventilation ratio: one square metre per three hundred of ceiling area. I measure the under-roof volume first, then work backwards to the required throat. The panel profile influences the mounting angle.
Consider these points when sizing:
- Confirm the manufacturer’s net free area for the roof sheet exhaust, often less than the gross opening.
- Distribute the total exhaust area across multiple units on the ridge line.
A deeper flute needs a wider base plate to maintain the water column. I install on the leeward side with even spacing to avoid dead pockets. Staggering units on opposite slopes encourages cross-flow without weakening the roof structure.
Mounting Methods for Screw-Down and Standing Seam Panels
The difference between a leaking roof and a sealed one comes down to how the vent meets the metal. Installing a roof sheet exhaust on corrugated panels requires a different approach for each profile. Screw-down panels accept direct fastening through the base plate, but the fastener must seat into the purlin below. I pre-drill through the flute crown, never the valley, to maintain water runoff. Clamps attach to the raised seam instead, allowing the exhaust unit to float without cutting the panel.
For screw-down installations, the following order works well:
– Cut the opening with shears, not a grinder.
– Slide the flashing base under the surrounding sheets.
– Fasten with self-tapping screws into the structural member.
Standing seam systems skip the cutting. Seam clamps hold the bracket, and the roof sheet exhaust sits above the panel with a continuous rubber gasket. Thermal movement is absorbed by the clamp design, important under South Africa’s sun. The seal remains intact because nothing penetrates the metal.
Upgrading and Retrofitting Existing Exhaust Ventilation
Assessing the Performance of an Older Ventilation System
An older roof sheet exhaust system can operate far below its original capacity. Rusted flashings, warped base plates, and bird mesh clogged with debris reduce airflow dramatically. Before investing in new components, assess what remains usable. The inspection takes under an hour and pays for itself!
The first inspection should cover the throat of the ventilator and the surrounding panel condition. Loose screws and lifted seams compromise the seal. Check whether a turbine spins freely or whether bearing wear has slowed it. Static vents need a closer look at the internal baffles.
An ageing system may still perform well with targeted repairs. Patching one section while ignoring the rest often creates unequal pressure zones. I have seen installations where a single blocked vent caused condensation problems across an entire warehouse roof.
Measuring cavity temperature on a hot afternoon provides a practical benchmark. If the roof sheet exhaust cannot keep the cavity within a reasonable margin of ambient temperature, retrofitting with a larger unit is justified.
Replacing Damaged or Inefficient Vents
I have replaced dozens of damaged roof sheet exhaust units, and the failure pattern never surprises me. In South Africa, UV light destroys rubber gaskets long before the metal body wears out. Heat distorts plastic bases within two summers. The metal components survive, but the seal fails. Check the base plate for warping. Check the bearing housing for play. If either fails, the entire unit deserves retirement.
Here is what typically goes wrong:
- Galvanised screws corrode where they meet the aluminium flashing
- Bird mesh collapses inward, blocking the throat
- Spun shafts lose their true centre
A replacement roof sheet exhaust should match the existing hole size. Newer units often use a taller profile to increase suction without enlarging the roof aperture. The throat diameter and flange width dictate compatibility, and most suppliers stock standard sizes.
Adding Supplemental Exhaust Points Without Full Reroofing
By year ten, half of all roof sheet exhaust units in South Africa are underperforming. The culprit is usually the seal, not the spinner. Retrofitting beats reroofing.
The throat diameter and flange width are the only dimensions that truly matter when upgrading. Newer units often use a taller profile to increase suction without enlarging the roof aperture. You can swap an old unit for a more powerful one without cutting new holes in the sheeting.
Adding supplemental exhaust points without full reroofing needs a different approach. Get these right:
- Locate the purlin spacing before cutting.
- Match the new unit’s base dimensions to the existing roof profile.
- Order new bird mesh with the unit, because the old mesh will collapse inward.
Distribute the new exhaust points evenly between existing units. A roof sheet exhaust too close to an existing turbine creates turbulence that reduces both units.


0 Comments