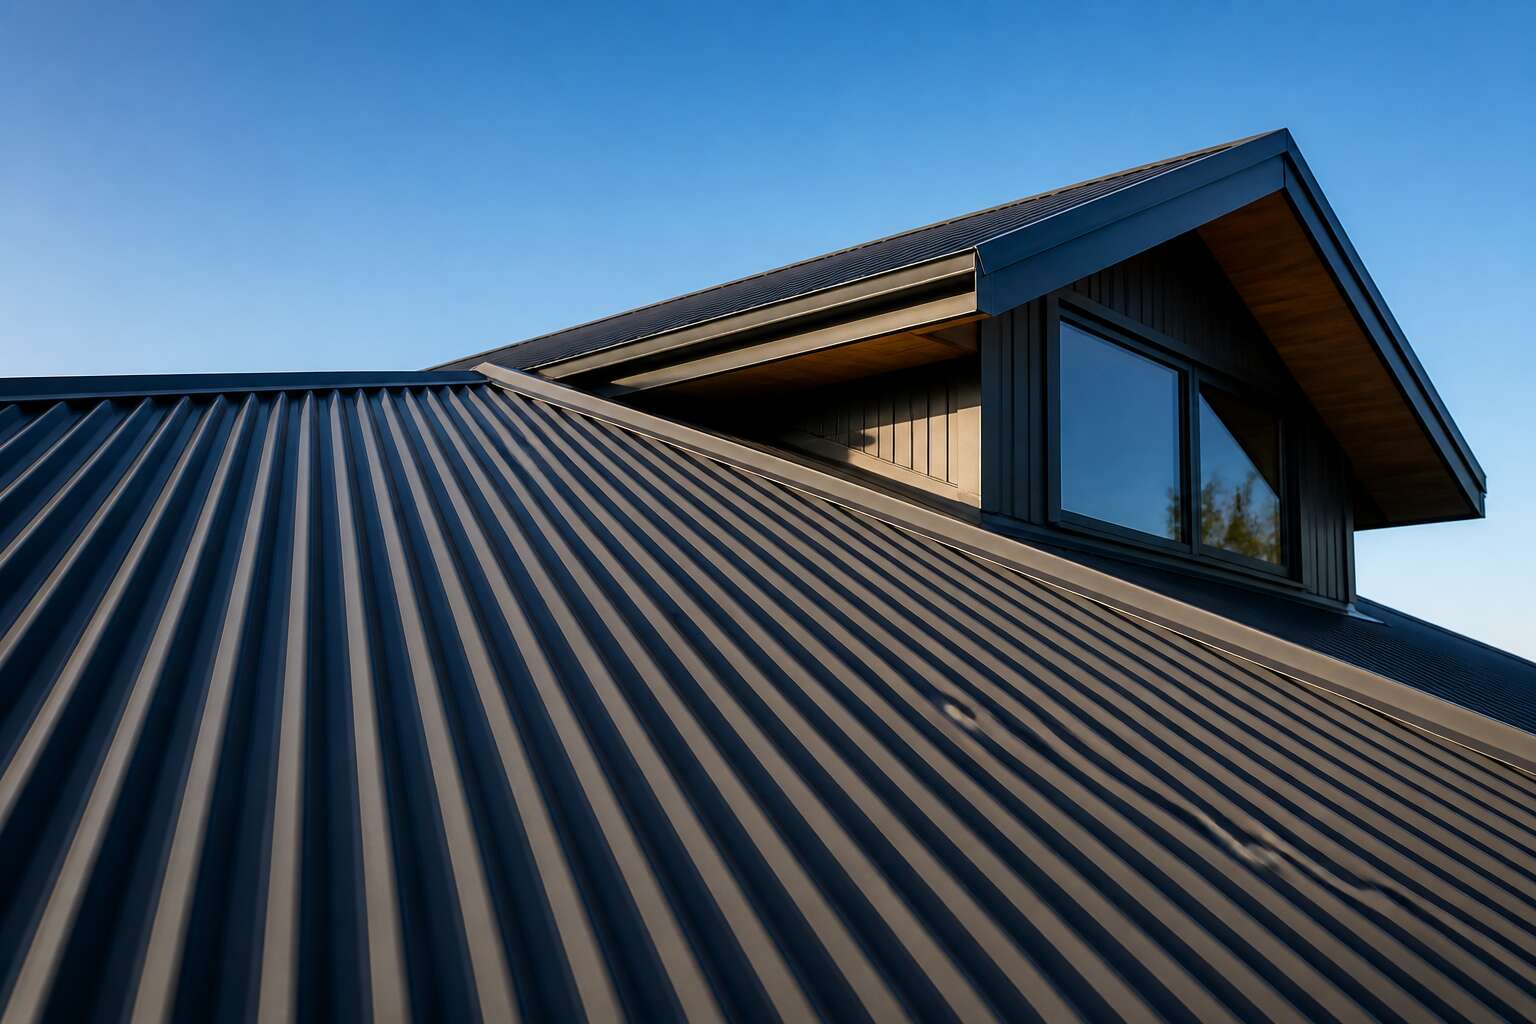
Understanding Your Roof Covering Choices
Metal Roofing Panels and Their Advantages
South Africa’s climate is a crucible of extremes. It can deliver punishing ultraviolet rays, relentless wind, and sudden, violent hailstorms in equal measure. Under this pressure, the selection of your roof sheets material becomes the defining factor between a home that simply shelters you and one that stands as a formidable fortress against the elements. Metal roofing has emerged as the definitive champion. It does far more than just cover a structure; it actively repels heat, sheds water with remarkable efficiency, and requires a fraction of the upkeep of other options.
Homeowners and builders are turning to this solution for several compelling reasons:
– Unmatched durability that endures for decades
– Superior fire resistance for added peace of mind
– Significant energy savings through reflective coatings
– Lightweight construction that reduces structural load
The true beauty of metal lies in this powerful combination of resilience and long-term value. It offers an immediate sense of security, knowing your investment is protected. Ultimately, choosing the proper roof sheets material is not a mere purchase; it’s a strategic decision that enhances property value and delivers unwavering performance for the long haul.
Polycarbonate Panels for Natural Light Transmission
Ask any builder in Limpopo about the gloom under a solid roof, and you will hear a familiar complaint. Polycarbonate panels answer that complaint with steady daylight. They transmit natural light while filtering the harshest ultraviolet rays. This roof sheets material is translucent, resilient, and lighter than glass. I have seen carports become workable spaces once fitted with these panels. They resist impact from hail and do not yellow under continuous exposure.
- covered patios that feel enclosed
- walkways between buildings
- greenhouses for sensitive plants
The heat gain remains modest compared with clear glass. For these locations, polycarbonate provides illumination without sacrificing structural safety. Homeowners who seek light without glare should examine this option carefully.
Fiber Cement Boards: Strength and Style
One hundred years ago, Austrian engineers pressed cement with cellulose fibres into a compact board designed for hard climates. That same recipe still covers rural sheds, coastal holiday homes, and Karoo farmsteads today. This roof sheets material is heavy, and it will test a builder’s patience during installation, but it returns that effort with decades of quiet weather.
The visual has aged well. Modern pressing dies give the surface the grain of cedar shake, the strata of slate, or the shadow of rough stone. A guesthouse near Bloubergstrand or a homestead in Graaff-Reinet can carry a heritage look without commissioning a single piece of natural stone.
Under your hand the board has predictable habits: it swallows the drum of thunder, it refuses to soften in extreme heat, and it holds its washers firm when the wind shakes the field. That is preference when a house must simply stay a house.
Bitumen Roofing: Flexibility and Water Resistance
In the low light of a winter storm, bitumen roofing reveals its true character. This roof sheets material does not fight the rain; it absorbs the assault with a quiet, yielding surface that water cannot penetrate. The flexibility is almost unsettling, a membrane that bends with the wind instead of resisting it.
For coastal towns like Paternoster or Stilbaai, where salt air corrodes steel and sun cracks timber, bitumen offers a different covenant. It clings to curved roofs and awkward valleys, sealing every corner with the patience of something that has weathered decades. Its habits suit harsh climates:
- It expands and contracts without splitting, even in the Karoo’s brutal temperature swings.
- It resists pooling water on low slopes, shedding storms with a slow, deliberate grace.
When you select this roof sheets material, you gain a covering that makes no noise, demands no attention. It waits through the seasons, flexing quietly, keeping the house dry while the sky does its worst.
Choosing the Right Roofing Based on Key Factors
Climate and Weather Exposure
In the Western Cape, winter gales peel back inadequate coverings, while the Lowveld’s summer heat warps materials that cannot cope with thermal cycling. Choosing the right roof sheets material begins with understanding your local climate.
Coastal regions introduce salt-laden air that corrodes unprotected surfaces. Inland, high UV index values degrade certain polymers within a few seasons. Altitude changes snowfall and frost patterns. These variables shape the weather exposure each roof must endure!
Consider the following climatic pressures when evaluating roof sheets material:
- Wind speed and uplift pressure
- Hailstone diameter and impact frequency
- Daily temperature swings that cause expansion and contraction
A roof that survives a Johannesburg thunderstorm may fail under an Atlantic front. The same material behaves differently on a north facing slope versus a shaded southern slope. Matching the product’s properties to these conditions prevents premature failure.
Expected Lifespan and Warranty
Choosing the Right Roofing Material
The roofing material you select determines how well your home handles local weather. The right choice depends on rainfall, temperature ranges, and wind patterns in your area.
Asphalt shingles are the most common residential option. They cost less than other materials and install quickly. Three-tab shingles weigh less and suit mild climates. Architectural shingles are thicker and handle moderate wind better. Asphalt absorbs heat, which makes it less ideal for hot climates where cooling costs matter.
Metal roofing performs well in areas with heavy rain or snow. The panels shed water and snow quickly, preventing buildup. Metal reflects solar heat, which reduces cooling costs in warm regions. The material resists wind damage, though it can dent from large hail. Installation requires a contractor experienced with metal systems, as improper fastening leads to problems.
Clay and concrete tiles work well in hot, dry climates. The thermal mass of these tiles slows heat transfer into the home. They resist fire and hold up against salt air in coastal areas. The weight of clay and concrete requires a roof structure capable of supporting it, which may mean extra framing.
Slate offers a long lifespan, often exceeding 100 years. It withstands fire, rot, and insect damage. Slate is heavy and costs more than most materials. The installation process is specialized, and repairs require a contractor who knows how to work with the material.
Wood shingles and shakes provide natural insulation and suit cooler climates. They need regular treatment to resist moisture and insects. Wood performs poorly in areas with frequent wildfires unless treated with fire retardant.
Flat roofing materials such as modified bitumen or single-ply membranes suit low-slope roofs. These systems require proper drainage to prevent ponding water. The materials have shorter lifespans than sloped-roof options.
Climate Matching
In coastal regions, salt spray corrodes metal fasteners and panels. Choose materials with corrosion-resistant coatings or select non-metal options.
In areas with frequent hail, seek materials rated for impact resistance. Many manufacturers offer impact ratings that help you compare products.
In cold climates, consider how the material handles ice dams. Ice dams form when heat escapes through the roof and melts snow, which then refreezes at the edge. Proper ventilation and insulation matter as much as the material itself.
In hot climates, reflective materials reduce cooling load. Some shingles carry reflective granule coatings that lower surface temperature.
Structural Considerations
Your roof framing limits which materials you can use. Heavier materials like slate or tile require stronger framing. Consult a structural engineer before choosing a heavy system for a home not designed for it.
The roof slope also narrows your options. Steep pitches allow most materials. Low slopes require materials designed for minimal water flow, such as specialized membranes.
Cost and Lifespan
Compare the material cost, installation cost, and expected lifespan together. A roofing system that lasts twice as long may cost less over time even with a higher upfront price. Ask contractors for a cost-per-year figure based on the material’s expected lifespan.
Finding the Right Contractor
The roofing material is only one part of the system. The underlayment, flashing, edge details, and ventilation determine how well the roof performs. Choose a contractor who has installed the specific material you are considering. Ask for references from recent jobs using the same system.
Choosing the right roofing material comes down to your climate, your roof structure, and your budget. A careful evaluation of these factors leads to a roof that performs well and lasts.
Insulation and Energy Efficiency
Roof sheets material comes in several types, each with distinct properties. The main options are metal, plastic, and fiber cement. Your choice depends on your budget, climate, and building use.
Metal roof sheets are the most common. Steel and aluminum are the standard metals. Steel offers high strength and lower cost. Aluminum resists corrosion better and weighs less. Both metals suit industrial, agricultural, and residential buildings.
Galvanized steel has a zinc coating that prevents rust. Galvalume steel uses aluminum and zinc, which extends its lifespan. Color-coated steel adds a painted layer for appearance and extra protection.
Corrugated metal sheets have wavy profiles. These ridges add stiffness and allow water runoff. Trapezoidal sheets have a flatter profile with rectangular ribs. They provide a more modern look and handle foot traffic better.
Plastic roof sheets include polycarbonate and fiberglass. Polycarbonate transmits light while blocking UV rays. It resists impact and remains clear for years. Fiberglass sheets are cheaper but yellow over time. Plastic sheets suit carports, patios, greenhouses, and skylights.
Fiber cement sheets contain cement and cellulose fibers. They resist fire, rot, and insects. They are heavier than metal and require stronger framing. Fiber cement suits areas with high humidity and needs no painting.
The material thickness matters. Thicker sheets handle wind and impact better. Standard steel starts at 0.4 millimeters. Heavy-duty profiles start at 0.6 millimeters. Plastic sheets range from 0.8 to 3.0 millimeters.
The coating system affects durability. Zinc coatings are measured by weight per square meter. Higher zinc weights last longer. Paint systems with primer and topcoat resist fading better than single-layer paints.
The profile depth determines the maximum span between purlins. Shallow profiles suit shorter spans. Deep profiles support wider spacing. Check manufacturer span tables for your specific load requirements.
Roof sheets material cost varies widely. Plain galvanized steel is the cheapest. Color-coated steel costs more. Polycarbonate is the most expensive per square meter. Fiber cement sits between steel and polycarbonate in price.
Installation affects the sheet lifespan. Overlapping sheets need proper side laps and end laps. Fasteners must be the correct type for your material. Rubber washers prevent leaks around screws. Ridge caps and flashing close off the open edges.
The roof pitch influences material selection. Steep roofs suit lighter sheets. Low-pitch roofs need sealed joints to prevent water entry. Some profiles are designed specifically for low slopes.
Thermal performance varies by material. Uncoated metal conducts heat and can raise indoor temperatures. Insulated panels contain foam between two metal layers. Polycarbonate can reduce heat transfer. Reflective coatings cut heat gain in hot climates.
Noise is a factor with metal roofs. Rain and hail create sound on uncovered metal sheets. Insulation layers reduce this noise. Acoustic underlays absorb sound. Fiber cement and plastic make less noise during rain.
Maintenance requirements differ. Galvanized steel needs repainting when the zinc wears thin. Color-coated steel needs periodic washing and touch-up. Polycarbonate needs cleaning to maintain clarity. Fiber cement is low maintenance but must be handled carefully during installation.
The environmental impact matters in material selection. Steel contains recycled content and is recyclable at end of life. Aluminum is also recyclable. Polycarbonate can last 20 years and is recyclable. Fiber cement has high embodied energy in its production.
Manufacturer warranties provide a guideline for expected lifespan. Galvanized steel warranties range from 10 to 20 years. Color-coated steel can be warranted for 25 years. Polycarbonate warranties vary from 5 to 10 years. Fiber cement warranties typically reach 15 years.
Your local weather determines the best material. Coastal areas need aluminum or coated steel. High wind zones need deeper profiles and more fasteners. Snow loads require thicker sheets. Hail damage is less common with metal than with fiber cement.
Fire resistance is a safety consideration. Metal and fiber cement do not burn. Polycarbonate is combustible. Buildings in fire-prone areas should use non-combustible roof sheets.
The building code may specify minimum requirements. Some areas require specific uplift ratings. Others mandate fire ratings. Check with your local authority before purchasing roof sheets material.
The supplier matters as much as the material. A reputable supplier provides accurate technical data. They offer matching accessories and fasteners. They can recommend profiles for your exact project.
When you purchase roof sheets material, compare total installed cost. This includes sheets, fasteners, flashing, ridge caps, and labor. A cheaper sheet with complex installation may cost more overall.
The color of your roof affects building temperature. Light colors reflect sunlight and keep the building cooler. Dark colors absorb heat and are better for cold climates. This choice can change your energy use.
The sheet width affects the number of seams. Wider sheets mean fewer overlaps. Fewer overlaps reduce the chance of leaks. Some profiles come in widths over one meter.
Handling and storage affect sheet quality. Store sheets at an angle on supports. Keep them dry to prevent white rust. Cut sheets with proper tools to avoid edge corrosion.
Roof sheets material is a broad category. The right choice fits your budget, climate, and building design. Compare products from multiple brands. Ask for samples and test them where possible.
Budget Constraints and Financing Options
Budget is the first constraint you meet. It decides which roof sheets material you can afford before you consult a supplier. In South Africa, the gap between aspiration and allowance is often wide. Steel remains the most forgiving option for tight budgets. Galvanized sheets cost less upfront, but their lifespan is shorter than coated alternatives. Polycarbonate offers light but demands a higher price. Fiber cement sits in the middle, heavy and durable, yet it requires stronger framing that adds to the total cost.
Financing options exist for those who cannot pay in full:
1. Lay-by arrangements with local suppliers.
2. Building material loans through major banks.
3. Credit facilities offered by hardware chains.
The choice of roof sheets material affects these terms. A cheaper sheet may allow you to finish the roof sooner. A premium sheet may force you into a longer repayment period. Consider the total cost, not just the price per square meter. Fasteners, flashing, and installation all carry their own weight. That weight is real, and it will follow you long after the roof is sealed.
Architectural Aesthetics and Curb Appeal
Your roof is the first line of your statement on a South African street. From the lowveld suburbs to the coastal estates, the roofline either defines a home or declares a mismatch. The roof sheets material you choose sets the visual scale. A low profile panel delivers a smooth, contemporary surface, while a high profile panel casts a textured shadow in the long sunlight. Colour carries the same weight. It must hold its own under the merciless glare, where pale shades fade and deep hues anchor the entire silhouette.
I have walked through a block where the architecture was intentional, but the roof looked like an afterthought. The decisive character comes from the proportion between the sheets and the wall. A clean, long profile suits a minimalist facade. A curved sheet respects a classic gable. There is no universal roof sheets material for pure beauty. There is only the roof that balances the skyline and the scale of the home. Curb appeal lives in that particular fit, a silent conversation between the building and the street.
Step-by-Step Installation Guidance
Preparing the Roof Deck and Structure
Roof sheets material, polycarbonate or bitumen, only performs as well as the deck beneath it. A skewed or weathered rooftop will compromise even the most premium panel. In South Africa, where thunderstorms batter coastlines and dry winters crack timber, preparation for any roof sheets material cannot be rushed! Measure diagonal lines across the roof deck to confirm squareness, then inspect each truss for warping or rot. Remove debris, protruding nails, and splinters from the surface. These acts prevent future punctures and leaks.
Structure must breathe! Ventilation gaps along the eaves allow moisture to escape, reducing condensation that creeps under the sheets. If steel purlins sit exposed, I apply a rust-inhibiting primer before any membrane touches them. The sequence demands attention:
- Plumb rafter ends to verify alignment.
- Check batten spacing against manufacturer specifications.
- Lay down a waterproof underlayment to seal fissures.
Each step protects your investment against the unpredictable Highveld climate.
Laying Underlayment and Vapor Barriers
Underlayment and vapor barriers form the silent defence beneath any robust roofing system. Before you lay a single sheet of your chosen roof sheets material, establish a clean, dry deck. Roll out the underlayment horizontally, overlapping each course by at least 150mm. Secure it with galvanised clouts or staples along the edges. For vapor barriers, place them on the warm side of the insulation.
Follow this sequence:
- Start at the eaves and work upward.
- Overlap all joints by 200mm for watertightness.
- Seal penetrations with compatible tape or mastic.
A correctly installed barrier prevents condensation and prolongs the lifespan of your roof sheets material. Measure twice and fix once; a rushed job will fail prematurely.
Securing Panels and Fastening Patterns
Few things test a roof’s mettle like the Highveld’s sudden hailstorms or the coast’s relentless salt air. As you heft each panel into place, remember that the fastener is the quiet custodian of your entire investment. The roof sheets material may be tough, but its performance lives and dies by the nailing pattern you choose.
Start at the windward side, the side that takes the brunt of the weather. Fix each sheet with a staggered pattern, working from the centre outwards to the edges. This simple act prevents the sheets from buckling as the metal expands and contracts through the seasons. You must seat each screw squarely, but do not overdrive it. The washer needs a firm grip, not a crushed one.
For practical guidance on spacing, consider the following sequence:
– Use a minimum of five fasteners per square metre for roof sheets material
– Place screws into every second rib at the end laps, then into every rib at the gable ends
– Fix the side laps with screws spaced no more than 300mm apart
– Use neoprene washers that match the sheet colour to prevent rust bleed
Do not skimp on the seam. A flimsy lap will chatter in the wind and invite water ingress. When you cut the sheets on site, always trim with a nibbler or fine-tooth saw. An angle grinder with a cut-off disc will strip the anti-corrosive coating from the cut edge, leaving your roof sheets material vulnerable to rust. Follow the manufacturer’s gauge recommendations for purlin spacing; a sagging line under foot tells you the span is too wide. You are not just building a cover, you are building a promise of shelter that must endure the summer thunderstorms and the quiet winter mornings alike.
Sealing Joints and Avoiding Leaks
Water follows gravity, but it also follows poor workmanship. The joints between your roof sheets material are where most leaks begin, and the irony is that they are entirely preventable.
Start with the end lap. Every manufacturer specifies a minimum overlap, usually around 150mm for a standard pitch. Respect that figure. A shorter lap might look fine from the ground, but wind-driven rain will find it within the first season. The step is simple: lay the upper sheet over the lower one, align the ridges, and make certain the surface is dry before you add any sealant tape.
Flashing deserves its own moment of attention. Valleys, ridges, and the junctions where the roof meets a wall are the critical points. Valley flashings should be fitted before the sheets themselves, and they need a minimum width that matches the rainfall expectations of your region. On the Highveld, that is a different calculation than the coast. But in every case, the flashing must extend under the sheets, not merely butt against them.
Penetrations are the other weak points. Pipes, vents, and skylights interrupt the roof plane, and each one is a potential failure point in your roof sheets material. Use the correct flashing collar for each penetration, and seal it with the proper mastic. Do not rely on silicone alone. The movement of the roof sheets material as it expands and contracts will break a brittle seal within a year.
A short checklist holds true across installations:
- Keep the end laps above the minimum specified by the manufacturer.
- Ensure valley and ridge flashings are installed before the sheets.
- Use dedicated collars and mastics for every roof penetration.
- Apply sealant only to clean, dry surfaces on a day without rain.
The single most effective habit is to walk the roof after installation, before the builder leaves. Look at every joint, every flashing, every sealant bead, because the cost of returning to fix a leak is always higher than the cost of getting it right the first time.
Handling Flashing and Edge Details
Getting the installation sequence right matters as much as choosing the correct roof sheets material. Work methodically from the eaves upward, fixing each sheet square before moving to the next. Overlap side laps by one full corrugation and end laps according to the manufacturer’s pitch and slope guide. Pre-drill holes where recommended, and always use the correct fastener with a sealing washer, never over-tighten.
Flashing needs careful attention at every transition. Install ridge capping last, but fit apron flashings and side wall flashings as you progress. Cut valley flashings accurately and fold the upstand to direct water cleanly. Check that each flashing overlaps the one below it, so water never runs behind a joint. A neat edge detail, finished with a proper barge capping or drip edge, protects the vulnerable cut ends of the roof sheets material from moisture ingress. Walk the completed roof and inspect every fixing and flashing seam before you call the job done.
Essential Safety Precautions and Tools
Working with roof sheets material starts before you climb the ladder. Assess the weather and your physical condition. Install only in dry, calm conditions. Wear a safety harness anchored to a structural point, and use non-slip footwear. Never work alone; a second person on the ground is essential. Clear the area below to prevent injury from dropped tools or fasteners.
The correct tools reduce risk. Keep these within reach:
- Drill with a depth stop to prevent over-driving
- Tin snips or a grinder for cutting panels
- Chalk line for accurate alignment
- Magnetic bit holder to avoid dropped screws
- Ladder stabiliser or scaffold for a secure base
Cut panels on the ground, not on the roof. Secure each sheet immediately after positioning. A sudden gust can lift an unsecured sheet and send it airborne. Fasten through the crown and never over-tighten. These steps keep the installation safe and the roof sheets material intact.
Maintenance Tips for Long-Lasting Roofing
Routine Cleaning and Debris Removal
Most roof sheets material fails long before its rated years because of quiet accumulation, not storm impact. In parts of Johannesburg and Durban, airborne dust and those brittle acacia leaves settle into the crevices. Once the first rain hits, the mix holds moisture against the protective coating. That trapped dampness does more harm than.
A basic routine for the surface prevents that slow erosion. The items that need attention shift with the season, so look for what your garden and veld drop:
- Fallen papaya leaves that wrap around fasteners.
- Tarry nits and buds from jacaranda trees.
- Windblown gravel that creates small paint chips.
Work from the top ridge down, using just warm water on a soft cloth broom. Stay away from pressure washers.
They can hit the overlap seams and push the edge of the protective layer. A simple squeegee handles most debris without ever touching the surface.
Fresh layer matters less that regular small action. Keep the roof sheets material visible and clean, and it looks after itself.
Inspecting for Damage and Wear
A clean surface tells the truth about your roof sheets material. After the autumn leaves are swept away, the real damage shows itself. I once spotted a hairline crack along a fastener line in Krugersdorp that stayed hidden for another season. That crack let water reach the timber supports, doubling the repair cost.
Inspection is about looking at the small things. Check the metal around chimneys and vents, where movement from temperature changes creates stress. Look at the colour of the metal near the edges. A dull grey haze often means the protective layer is breaking down.
- Loose or missing rivets
- Dents from hail that have not punctured through
- Discoloured patches that suggest trapped moisture
These signs appear long before a leak does. A monthly walk, plus a close look after a hailstorm, catches most problems. Your roof sheets material will reward that attention with years of quiet service.
Managing Rust and Corrosion
In South Africa, rust is not merely an eyesore; it is the quiet metabolism of decay. The South African Insurance Association notes that weather-related roof claims spike after prolonged humid spells, and corrosion sits at the heart of many of those failures. I have seen pristine roof sheets material fail from the inside out, the metal flaking away long before anyone noticed a stain on the ceiling. Corrosion begins where water lingers. Salt-laden air along the coast accelerates the process, but inland, the culprit is often trapped condensation beneath a poorly ventilated profile.
The protective layer on your roof sheets material does not surrender overnight. It weakens gradually, exposing bare metal to oxygen and moisture. Scratching the surface with a wire brush during installation is one common mistake. Another is allowing dissimilar metals to touch, which creates galvanic corrosion.
– Fastener heads that were over-torqued and stripped of their coating
– Cut edges left raw and unprimed along ridges and valleys
– Gutters that overflow and splash back onto the sheeting
A simple practice of washing the roof with fresh water every few months removes the dust that holds moisture against the surface. For coastal homes, a routine rinse is not optional. It is the difference between a roof that carries thirty years of weather and one that quietly crumbles at the seams. Zinc-rich primers, applied early, stop the spread of rust before it burrows beneath the paint system. On older profiles, a simple galvanic anode attached near the eaves can draw corrosive activity away from the critical fastener lines. The goal is not to create a fortress, but to slow the inevitable progression of time and elements.
Repairing Leaks and Replacing Panels
A leak in your roof sheets material rarely announces itself with drama. It starts as a faint watermark on a ceiling board, a persistent drip during a Highveld thunderstorm, or a dark stain that grows after each rain event. The true origin of the problem is often several metres away from where the water lands. Water travels along the underside of the profile, following the ribs and channels until it finds a gap. The most common culprits are fastener holes that have worked loose over time, particularly where the rubber washers have perished under the sun’s relentless UV exposure. Another frequent offender is the flashing where the roof meets a wall or chimney, where a single misaligned fold creates a persistent ingress point that defies simple patching.
When you do locate the source, resist the urge to smear a thick layer of sealant over the problem. That approach treats the symptom, not the cause. The correct procedure is to remove the offending fastener, clean the hole, and install a new screw with a fresh EPDM washer. For torn or split panels, a patch is only a temporary measure. A panel that has split along its length has lost its structural integrity and will continue to fail. The only proper solution is to replace that entire section of roofing. You can buy new roof sheets material cut to the exact length of the old panel, ensuring the profile matches the existing corrugation precisely.
Here is the method for a successful panel replacement:
- Measure the distance from the fascia to the ridge, accounting for the required overlap at both ends.
- Remove the fasteners along both sides of the damaged panel and slide it out from under the adjacent sheets.
- Slide the new panel into place, ensuring it sits squarely within the side laps.
- Secure it with new fasteners, placed in the crown of the profile, and do not over-torque them.
This process is far simpler when the original installation used a consistent brand and gauge. Mixing profiles from different manufacturers creates mismatched side laps that invite leaks. The same principle applies to your choice of roof sheets material for the replacement. Stick to the same thickness and coating specification as the original, or you will introduce a galvanic reaction between dissimilar metals. A repaired roof should look as though it has always been there, not like a patchwork of compromises.
Applying Protective Coatings and Sealants
The Right Roof Sheets Material for South African Climates
A roof is a long-term investment, and the choice of material determines its lifespan, durability, and overall performance. In a country with diverse weather patterns, from scorching sun to heavy downpours, the correct roof sheets material is not just about aesthetics. It is about structural integrity and the comfort of everything beneath it. For many homeowners, the array of options can feel overwhelming, but the decision becomes clearer when you focus on specific environmental demands and your own maintenance capacity.
The market offers several primary categories, each with a distinct set of characteristics. When evaluating metal roofing panels, you are typically looking at options like Chromadek®, IBR, or corrugated sheets. These are prized for their incredible strength and longevity, often lasting decades with minimal intervention. On the other hand, polycarbonate panels offer a lightweight solution that excels in natural light transmission, making them ideal for carports, patios, and covered walkways where you want illumination without the glare of direct sunlight.
Maintenance Tips for Long-Lasting Roofing
To maximise the return on your investment, a proactive approach is essential. Here is a simple checklist to keep your roof in prime condition:
– Routine Cleaning: Remove leaves, branches, and other debris that trap moisture against the surface.
– Debris Removal: After a storm, check for any loose objects that may have landed on the roof.
– Inspecting for Damage: Look for lifted fasteners, cracked sealants, or any signs of wear on the protective coating.
Starting with the basics, you will need to ensure that your gutters are clear. Blocked gutters cause water to pool and back up under the edge of the sheeting, which accelerates corrosion and rot.
Applying Protective Coatings and Sealants
Preventative maintenance is the most cost-effective way to extend the life of any installation. The protective layer on metal sheeting is your first defence against the elements. Over time, this sacrificial layer can chip or scratch, exposing the underlying metal to rust. Touching up these areas with a high-quality acrylic or silicone-based sealant prevents moisture ingress and stops corrosion from spreading. For bitumen roofing, which is generally used on flat or low-pitch structures, the material offers flexibility and water resistance, but it is vulnerable to UV degradation. A reflective white coating can significantly lower internal temperatures and protect the membrane from cracking.
Repairing Leaks and Replacing Panels
A leak in your roof sheets material rarely announces itself with drama. It starts as a faint watermark on a ceiling board, a persistent drip during a Highveld thunderstorm, or a dark stain that grows after each rain event. The true origin of the problem is often several metres away from where the water lands. Water travels along the underside of the profile, following the ribs and channels until it finds a gap. The most common culprits are fastener holes that have worked loose over time, particularly where the rubber washers have perished under the sun’s relentless UV exposure. Another frequent offender is the flashing where the roof meets a wall or chimney, where a single misaligned fold creates a persistent ingress point that defies simple patching.
When you do locate the source, resist the urge to smear a thick layer of sealant over the problem. That approach treats the symptom, not the cause. The correct procedure is to remove the offending fastener, clean the hole, and install a new screw with a fresh EPDM washer. For torn or split panels, a patch is only a temporary measure. A panel that has split along its length has lost its structural integrity and will continue to fail. The only proper solution is to replace that entire section of roofing. You can buy new roof sheets material cut to the exact length of the old panel, ensuring the profile matches the existing corrugation precisely.
Here is the method for a successful panel replacement:
1. Measure the distance from the fascia to the ridge, accounting for the required overlap at both ends.
2. Remove the fasteners along both sides of the damaged panel and slide it out from under the adjacent sheets.
3. Slide the new panel into place, ensuring it sits squarely within the side laps.
4. Secure it with new fasteners, placed in the crown of the profile, and do not over-torque them.
This process is far simpler when the original installation used a consistent brand and gauge. Mixing profiles from different manufacturers creates mismatched side laps that invite leaks. The same principle applies to your choice of roof sheets material for the replacement. Stick to the same thickness and coating specification as the original, or you will introduce a galvanic reaction between dissimilar metals. A repaired roof should look as though it has always been there, not like a patchwork of compromises.
Handling Flashing and Edge Details
While the field of the roof carries the bulk of the weather, it is the edges and transitions that often define the lifespan of the installation. Valleys, hips, and ridges require purpose-made flashings to shed water effectively. When installing a new roof, ensure the flashing overlaps the sheets by at least 150mm. If you are working with fiber cement boards, which are renowned for their strength and style, they require specific cutting techniques to avoid dust and chipping. Use a fine-toothed blade and score the surface rather than snapping it, as this material is brittle. These boards offer excellent acoustic insulation, but they must be painted to protect them from moisture absorption.
Climate and Weather Exposure
South Africa’s interior can experience severe hailstorms, which can dent thin-profile metal roofing. If you live in Gauteng, you might want to invest in a thicker gauge (0.5mm or 0.58mm) to resist impact damage. In coastal regions, the saline air accelerates corrosion, so you will need a coating with a higher zinc content or a specialised marine-grade finish. Polycarbonate panels are generally resistant to hail, but they can scratch, which reduces their transparency over time. Always consider the orientation of the roof and the prevailing wind direction when planning the installation to prevent wind-driven rain from being forced up the laps.
Essential Safety Precautions and Tools
Working on a roof is inherently dangerous. Before you start any task, check the forecast. Slippery surfaces are a hazard even without rain. Use a safety harness secured to a robust anchor point. Have a second person on the ground to assist with material handling. When removing old sheeting, be careful of sharp edges and brittle fasteners. A magnetic screwdriver and a good quality drill with a torque setting are invaluable. Do not lift heavy panels in windy conditions; the metal acts like a sail and can easily cause injury. If you are unsure about the structural integrity of the roof frame, consult a professional engineer before proceeding.
Architectural Aesthetics and Curb Appeal
Beyond the functional aspect, your roof defines the visual character of your home. A bold, dark profile creates a striking contrast against a light wall colour, while a lighter shade helps to reflect heat. The profile of the roof sheets material changes the way light and shadow play across the facade. A corrugated profile offers a classic, rustic look, while a concealed-fix clip system provides a sleek, modern, and minimalist line that is popular in contemporary architecture. Whether you are renovating or building new, the choice of the profile and the colour should complement the style of the property to enhance its value and street presence.
Assessing Costs and Environmental Benefits
Comparing Upfront and Long-Term Expenses
The initial quote for a roof sheets material captures attention, but the true cost reveals itself over decades. In South Africa, where solar gain and storm exposure vary, the cheapest option can become the most expensive. A lighter gauge steel may save money today, yet it might require replacement before the bond is paid off. A premium product with a thicker protective layer could outlast the building itself.
The environmental accounting works similarly. Weigh these factors:
- Embodied energy during manufacturing
- Recyclability at end of life
- Thermal performance reducing cooling loads
- Transport distance from factory to site
Each factor shifts the balance. A locally produced roof sheets material cuts transport emissions and supports regional industry. That same material might offer reflectivity, lowering cooling demand. The upfront price is a single number. The long-term expense appears in maintenance logs, energy bills, and disposal costs. Those numbers reveal the truth.
Estimating Installation Labor Fees
Estimating installation labor fees for roof sheets material requires balancing upfront costs with environmental benefits. In South Africa, rates vary by province and roof complexity. A simple corrugated profile on a low-pitch roof might cost less, while standing seam or insulated panels demand skilled fitters.
Consider the full picture. Cheaper labor can lead to poor fastening, causing leaks and higher energy use. Environmental benefits come from proper installation too, as gaps undermine thermal performance. When assessing costs, factor in:
– Local labor availability and certification
– Roof height and accessibility
– Required flashing and ridge details
Also, compare the carbon footprint of transport versus local manufacturing of roof sheets material. A slightly higher installation fee often pays off through reduced maintenance and better insulation.
Recyclability and Sustainable Material Options
As South Africans weigh the ledger of roofing choices, the true cost of roof sheets material emerges only after many rainy seasons. Environmental benefits are not vague sentiment. They are measurable in energy saved and waste diverted. Recyclability turns a weathered roof into future steel or aluminum, preserving scarce elements.
Assessing costs means asking where a product comes from and where it can go. For sustainable material options, local smelting and coil coating cut transport emissions. A viable list of considerations might include:
- Recycled content already in the sheet
- Ease of separating coatings from base metal
- Regional scrap value and collection networks
The sober accounting of any roof sheets material must honor its second life. Patience with these details pays, quietly, for generations.
Energy Rebates and Tax Incentives
When assessing roof sheets material, South African homeowners often weigh upfront costs against long term savings. Energy rebates and tax incentives can shift that balance significantly. Several municipalities now reward installations that reduce heat transfer, while the national solar tax credit applies to reflective metal roofing systems.
– Compare purchase price with expected lifespan for each material.
– Factor in potential rebates for cool roof coatings or insulation layers.
– Check SARS thresholds for renewable energy deductions.
Environmental benefits are measurable too. Light coloured profiles lower cooling loads, and recycled steel content reduces landfill pressure. The true cost of your roof sheets material includes monthly electricity bills and future disposal fees. A slightly higher initial investment frequently pays back through lower utility costs and government support. Keep all invoices and compliance certificates handy, since rebate applications require documented proof of purchase and installation.



0 Comments