Common Causes of Roof Sheet Leaks
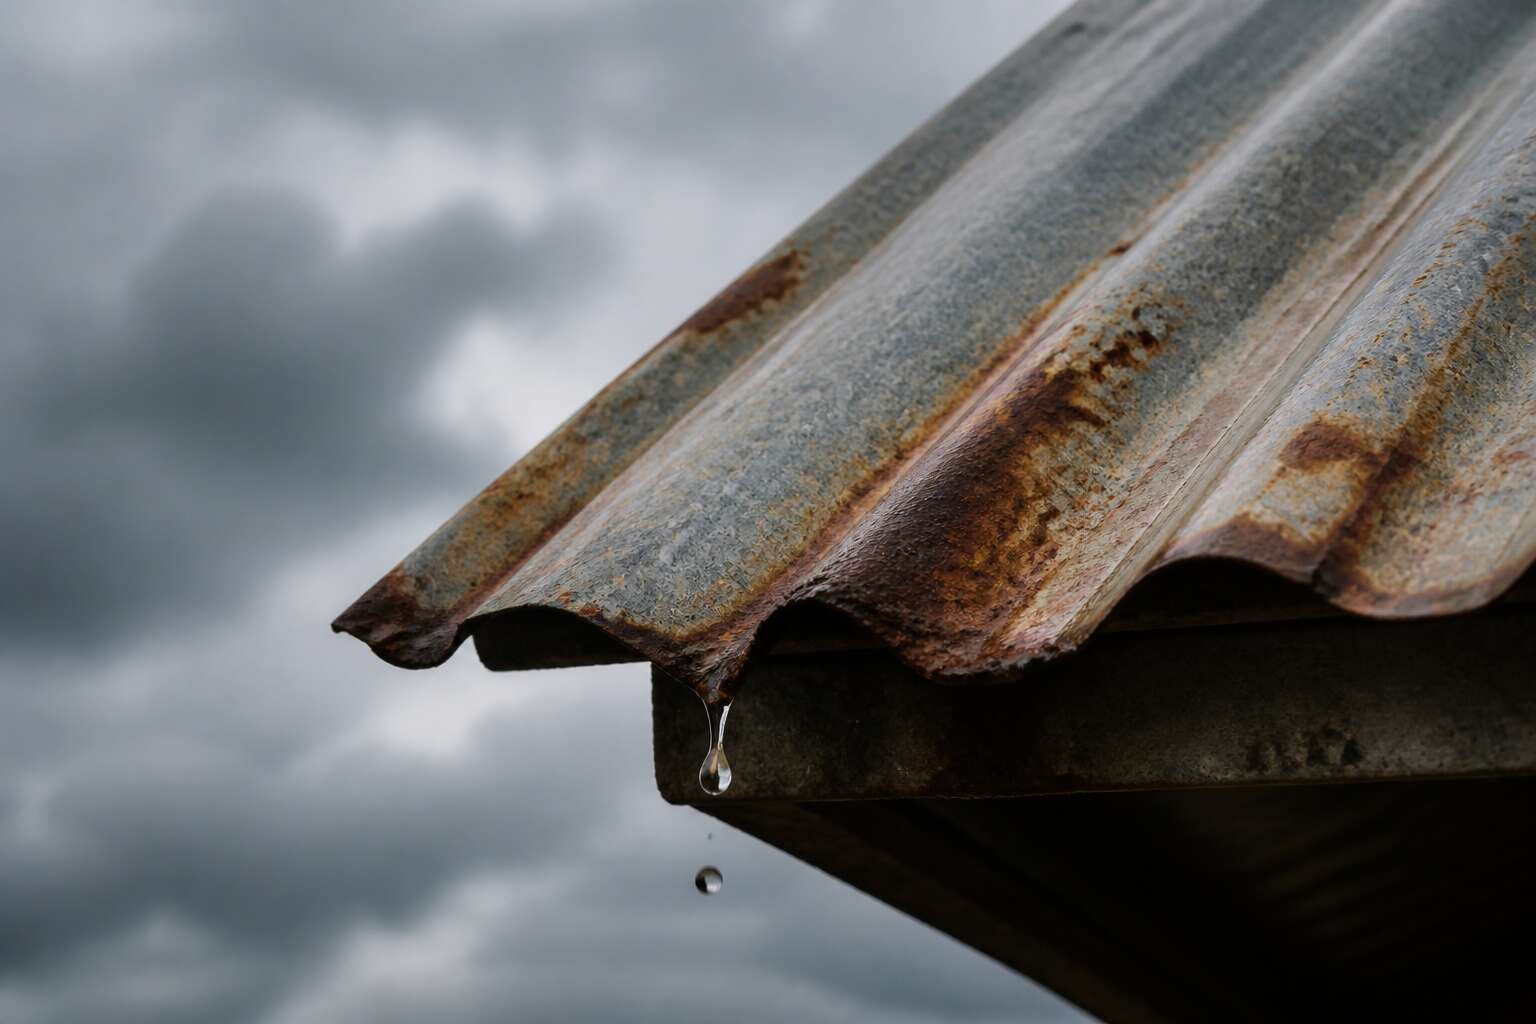
Corrosion and Rust on Metal Roof Sheets
In the coastal belt of South Africa, rust can eat through a steel roof sheet in less than a decade. The process begins when moisture and oxygen react with the exposed iron in the metal. Even a small scratch or a poorly drilled hole gives corrosion a starting point.
Once rust forms, it swells and flakes, opening the metal to deeper attack. The sheet gradually thins, and soon a roof sheets leek appears. High humidity, salt spray, and industrial pollution all accelerate the breakdown, turning minor blemishes into structural holes.
- Overlapping sheet edges that trap water
- Fastener holes with worn or missing washers
- Valleys filled with fallen leaves and debris
These are the first sites where rust takes hold, and examining them early saves more than just the roof.
Damaged or Missing Roof Screws and Fasteners
Every roof sheets leek I trace back to a screw starts the same way. The washer cracks, the seal dries out, or the screw backs out a quarter turn. Water finds that path in minutes, then spends years working it wider.
Fasteners fail in predictable patterns:
- Self-tapping screws driven at an angle, leaving a visible gap
- Washers perished under relentless UV exposure
- Screws missing entirely from a rushed repair job
South African summers accelerate this. Thermal movement pulls the sheets against the fasteners, and the holes oval out. By the time you notice a damp patch, the screw has already given up. That is when the leak stops being a suspicion and becomes a certainty.
Cracks and Splits from Thermal Expansion
South African summers are brutal on metal roofs. When temperatures soar past 40 degrees and drop sharply at night, roof sheets expand and contract relentlessly. This constant movement stresses the material, especially around fasteners and overlapping seams. Over time, micro-fractures appear, then widen into visible cracks. Splits often start near screw holes where the metal has been weakened. You might inspect your roof and see no obvious damage, yet a fine line indicates trouble. Those sneaky cracks are exactly why roof sheets leek during the next downpour. The thermal cycling also causes the protective coating to degrade, accelerating the process. Older roofs with thinner gauge steel are more vulnerable. Even slight shading differences, like a tree branch touching the surface, can create uneven expansion and localised stress points. The result is predictable: water finds the smallest gap and works its way inside.
Poor Flashing Installation Around Roof Penetrations
Water damage behind a seemingly intact roof often starts where the roof sheets leek around a chimney, a vent pipe, or a skylight. Flashing is the metal barrier directing water away from these joints, but improper installation turns it into a liability. Contractors sometimes skip the step of embedding the flashing into the mortar joints of a brick chimney. The result is a gap that channels water straight into the wall cavity.
The trouble is frequently invisible from the ground. A rooftop inspection may show neat metalwork, but if the flashing was nailed too tightly, the rubber gaskets crush and fail. Other common mistakes include:
– Failing to overlap flashing pieces correctly, leaving a butt joint that water can drive through.
– Using a different metal for flashing than the roof sheet, which causes galvanic corrosion at the junction.
The real problem is that water follows the path of least resistance, and a poorly sealed penetration is the easiest route. The joint between the vertical penetration and the horizontal roof plane experiences wild temperature swings. When the metal expands, a poorly secured flashing piece moves independently, opening a micro gap that was watertight in the morning. That precise gap is what causes roof sheets leek in the middle of a heavy storm. The damage might stay hidden for months, soaking insulation and rotting timber before any stain appears on the ceiling.
How to Identify and Locate Roof Sheet Leaks
Visual Inspection Techniques for Stains and Discoloration
Almost every roof sheets leek announces itself through a progressive spread of discoloration. On a sunny day, walk through your home and study each ceiling and wall junction. Stains appear in shades of brown, yellow, or grey, depending on water movement through timber or insulation.
An interior stain seldom sits directly beneath the penetration. Water runs along purlins, batten ends, and even electrical cables before dripping onto the plaster. To trace the origin, measure from the stain to the nearest wall, then climb into the roof space with a torch. Follow the damp timbers upward, noting any darkening or swelling.
From the roof exterior, use this sequence:
- Look for dark blotches or powdery residue on the sheet surface.
- Check valleys and gutters for leaf matter holding moisture.
- Scan overlaps between sheets where capillary action pulls water.
- Mark suspicious areas with chalk, then confirm during rain.
Using a Water Hose to Test Suspected Leak Areas
When visual checks refuse to reveal the source, the water hose test becomes your most reliable tool. Suspect a specific section of your roof sheets leek? Clear the debris first, because a blocked gutter will ruin the experiment.
- Seal the downpipe with a plug or bung.
- Direct the hose to the lowest point of the suspected area.
- Move the spray upward in a systematic grid pattern.
- Have an assistant inside the attic tracking the drips.
Patience is critical. Water takes time to travel along purlins and insulation. If your roof sheets leek in a hidden spot, the hose test will isolate the exact penetration line. Wait a full 30 minutes before moving the spray to a new zone. This method limits the work to a single fixing point without disturbing the surrounding profile. Your attic assistant will either thank you for the precision or hate you for the wait.
Tracing Water Trails Back to the Entry Point
Once your assistant spots the first drip, the actual locating starts. Water rarely falls straight down from the point of entry. It clings to the underside of your roof sheets leek, riding ribs and purlins before dropping onto insulation or rafters.
Start at the wettest stain, then trace the damp track backward. Calcium deposits, lime scale, or a faint rust line reveal the path. The highest point of that track is where the water first made contact. Run your fingers along the underside until you feel the breach.
A clean, narrow trail suggests a single small fissure. A wide spread indicates pooling over a long distance. Trace tributaries upward to their forks. This sequence narrows the search:
1. Mark the damp line with chalk.
2. Move upward along each rib.
3. Compare both sides of every fastener.
4. The point where the wetness stops is the entry.
That stopping point is the entry. Your roof sheets leek at that precise penetration, and the trail only shows the surface that caught the water first.
Checking Roof Valleys and Overlaps for Gaps
Roof valleys act as the drainage channels of your entire system. I’ve seen more leaks start here than anywhere else. When leaves and dust accumulate there, they hold moisture against the seam. The overlap between two roof sheets leek at the joint when the sealant has aged or the fastener has worked loose. Water pushes upward through capillary action in narrow gaps, especially during wind-driven rain.
Check these areas deliberately:
1. Look for lifted edges along the overlap
2. Feel for gaps between the sheets
3. Examine the valley where the two slopes meet
A gap of even two millimetres allows water to wick inside. In South African Highveld storms, wind speeds force rain sideways into these openings. The leak appears distant from the actual gap because water runs along the underlap before dripping. The valley and overlap points are where your roof sheets leek most frequently.
Inspecting the Roof from the Attic or Ceiling Space
The attic offers a different truth. From below, a leak is a stain. From above, it is a sound, a light source, or a dark trail. When roof sheets leek, the water travels along the underside of the sheeting before it ever reaches the ceiling. That makes the attic the best place to start tracing.
Work in the direction of the roof slope, checking each truss and purlin. Look for these indicators:
- Rust trails streaming down from a single point
- Water stains on the timber where the sheets overlap
- Mould growth on the underside insulation
- Visible daylight cutting through the roof covering
Damp insulation is a strong clue, but touch it carefully. I have seen attics where the wet spot sits a metre from the true entry point, because the water follows the profile of the sheeting before it drips.
Step-by-Step Repair Methods for Roof Sheet Leaks
Tightening or Replacing Corroded Screws and Washers
Roof sheets leek for many reasons, but the humble screw sits at the centre of the problem. A loose or corroded fastener can undo the integrity of an entire roof system, letting water creep through in ways that resist detection until damage appears. When roof sheets leek, I start by checking the fasteners first.
To tighten a screw, first check whether it turns freely. If it resists, stop! Forcing it strips the thread or enlarges the hole. When a screw has lost its grip, replacement is the better route.
- Remove the old screw with a drill and the correct bit
- Choose a new screw with a larger diameter and a fresh EPDM washer
- Apply a bead of sealant to the hole before driving
- Drive the new screw at a slight angle to catch fresh metal
Tightening or replacing corroded screws and washers demands patience. Each fastener deserves attention because the next rain will test your work.
Applying Roof Sealant to Cracks and Small Holes
A single hairline crack in a corrugated profile can force hundreds of litres of water through your ceiling boards during one Highveld thunderstorm. When roof sheets leek through thermal splits and impact damage, sealant offers a lasting repair if you respect the process. Surface preparation decides everything!
Brush away loose paint and rust with a stiff wire brush. Wipe the area with a solvent to strip oils and grime. Load a polyurethane sealant into a caulking gun and force it deep into the fissure. Do not smear it across the top only. Tool the bead flat with a putty knife so it bonds to the edges. Most roof sheets leek again because the sealant was applied too thin or over a dirty surface.
- Cut the nozzle at 45 degrees to match crack width
- Prime the gap with a bonding agent if the manufacturer requires it
- Check the forecast and allow 24 hours of dry curing
Patching Damaged Sections with Metal Flashing
When rust eats through a roof sheet or a heavy object leaves a dent, patching with metal flashing is the most permanent fix. Start by cutting a piece of galvanised flashing at least 50mm larger than the damaged area on every side. Position it over the hole, then trace the outline with a permanent marker. Drill pilot holes at each corner and along the edges, spacing them about 30mm apart. Apply a thick bead of roof sealant around the perimeter of the flashing, press it firmly into place, and drive self-tapping screws through every pilot hole. For a clean finish, run a final layer of sealant over the screw heads and the joint edge.
Before you begin, check that the surrounding roof sheets are dry and free of rust dust. Use a wire brush to scuff the surface where the flashing will sit, then wipe it down with a solvent. This step matters more than the patching itself. A flashing that adheres to clean metal will survive Highveld storms; one that grabs onto grime will lift within months. If you are working on a corrugated profile, bend the flashing slightly along a ridge to match the curve, or it will gap and channel water sideways. When done right, a metal patch outlasts the original sheet, and you will not be back on the ladder for a while. Roof sheets leek at the edges and at fasteners, but a solid flashing patch stops the problem at its source.
Replacing Severely Rusted or Warped Roof Sheets
Whenever rust flakes through a sheet or the metal warps severely, patching is a temporary diversion. The correct move is to replace the entire sheet. A severely rusted or warped roof sheet will continue to cause roof sheets leek no matter how much sealant you apply. Start by measuring the sheet length and profile, including the side overlaps.
Unfasten the old sheet. Extract every screw or nail along both edges and the ridge line. Lift the sheet off and inspect the purlins underneath. Remove any rust scale using a wire brush.
- Position the new sheet with the same overlap.
- Drive fasteners through the pre-drilled holes.
- Apply a continuous sealant bead along the overlaps.
A warped sheet never sits flush, so do not try to force it. Replace it before the resulting gap redirects water to the next sheet. This stops the leak at its source.
Re-Sealing Lap Joints Between Adjacent Sheets
A cracked sealant bead along a lap joint can turn a dry roof into a persistent roof sheets leek within one rainy season. Water enters through the overlap between adjacent sheets, and the first sign is often a stain on the ceiling long before the source becomes obvious.
Pry the upper sheet open with a flat bar. Scrape away all old sealant, rust scale, and debris from both surfaces. Apply a continuous sealant bead along the lower sheet’s rib, then press the upper sheet back into place and refasten. Work in short sections for long overlaps so the sealant stays workable and bonds properly.
The process in order:
- Lift the overlapping edge carefully.
- Scrape the joint clean to bare metal.
- Run a continuous sealant bead along the overlap.
- Press the sheet down and refasten.
This method stops a roof sheets leek before water travels further into the roof structure.
Upgrading Fasteners with Rubber-Sealed Options
Fasteners on a metal roof often fail years before the sheets themselves give out. Standard self-tapping screws carry a bonded washer that degrades under UV exposure. Once that washer hardens, water finds a path around the shank. An upgrade, using rubber-sealed fasteners with EPDM washers, restores the integrity of the fixing point.
The process is straightforward for a DIY owner or a contractor. Remove the old screw, clear any debris from the hole, and drive the new fastener straight into the same fixing point.
- Choose a screw with a zinc or stainless body.
- Verify the EPDM washer extends beyond the screw head.
- Check the manufacturer’s drive torque for your drill.
Overdriving the screw is the most common mistake. A compressed washer without a visible seal around the edge means the rubber is doing no work. Done correctly, this small upgrade eliminates a persistent roof sheets leek before it reaches the ceiling boards.
Preventing Future Roof Sheet Leaks
Scheduling Regular Roof Inspections and Maintenance
Every autumn, before the first storms arrive, the wise homeowner climbs a ladder and studies the roof closely. A single dramatic storm rarely causes roof sheets leek. Small warnings ignored too long are the usual culprit.
A schedule transforms guesswork into certainty. In South Africa, where ultraviolet radiation batters metal and hail tests the toughest profiles, inspections should occur twice yearly. Once before the wet season, once after. Each visit takes under an hour but prevents the damage that leads to ceiling stains and electrical faults.
Maintenance between inspections matters equally. Keep gutters clear, trim branches that scrape against metal, and ensure the attic has proper ventilation to reduce condensation. Some homeowners keep a maintenance log, and they are rarely caught off guard.
- Mark inspection dates on a calendar.
- Photograph roofing annually for comparison.
- Note sealant and washer condition.
- Record repairs with dates and materials.
When a schedule governs the work, the roof sheets leek far less often.
Clearing Debris from Gutters, Valleys, and Roof Drains
Blocked gutters are quiet saboteurs. When leaves and grit pile up, water creeps sideways under the metal edge where the roof sheets leek most often. The valleys, those subtle creases where slopes meet, trap the heaviest debris. They demand attention before the wet season arrives.
I once inspected a home where a single blocked roof drain flooded the ceiling cavity for months. The owners noticed nothing until stains appeared. That damage was entirely preventable.
The trouble spots are predictable:
- Gutter channels, especially at corners and joints
- Valley intersections, where leaves and twigs gather
- Roof drain openings, which clog with sediment
Keep these pathways open and the metal stays dry, the sealants hold, and the attic remains free of moisture. A monthly walk around the roofline takes ten minutes.
Applying Protective Coatings to Minimize Corrosion
Corrosion is not a singular event but a slow, deliberate process. Water and oxygen begin their work at the microscopic level, long before any visible damage appears on the surface. This is where the concept of prevention shifts from mere maintenance to strategic intervention. A protective coating acts as the first line of defense, creating a barrier that disrupts the electrochemical reaction that causes steel to oxidize. Without this barrier, the metal is left exposed to the elements, and the integrity of the entire structure is compromised.
I have seen galvanized steel that failed within a decade because the protective layer was allowed to wear thin at the overlap points. The exposed edges began to oxidize, producing a chalky residue known as white rust. This is often a warning sign that the zinc layer is depleted, and the base metal is now vulnerable. Applying a high quality acrylic or silicone based coating adds years to the service life of the roof, provided the surface is properly cleaned and primed beforehand. A coating applied over dirt or loose oxidation will fail prematurely, no matter how expensive the product.
Consider what a proper coating system involves, as it is more than a single brush stroke. It is a layered defense that addresses the specific weaknesses of the metal profile.
– A rust inhibitive primer to seal the bare metal and stop any active corrosion.
– A flexible top coat that can expand and contract with the thermal movement of the sheets.
– A final sealant applied to the fasteners and exposed cut edges to prevent capillary action.
The most vulnerable area is often the cut edge of the sheet, where the protective zinc layer is disturbed during installation. This is the precise location where roof sheets leek and where rust tends to form first. By coating these edges with a zinc rich paint, you restore the sacrificial protection that was lost during the cutting process. This simple action prevents the slow creep of corrosion from the perimeter into the flat planes of the sheet.
The initial cost of a good coating system is small when compared to the expense of replacing an entire roof. The application also provides a uniform appearance, which can improve the aesthetic value of the property. But the real value lies in the quiet assurance that the steel beneath the paint remains intact, holding firm against the persistent assault of rain and humidity. Over time, the coating becomes a shield, and the roof sheets leek no more, maintaining the dryness of the interior space.
When to Call a Professional for Roof Sheet Leaks
Signs of Significant Structural Damage or Sagging
A roofline that dips like a tired dancer is not a design feature. When your roof sheets leek, the water is often the messenger, but the sagging is the real problem. Structural damage means the supports beneath your metal sheets have surrendered, possibly from prolonged moisture or poor installation.
Call a professional if you spot any of these warning signs:
– A visible curve or dip in the ridge line.
– Gaps between roof sheets and the frame.
– Doors or windows that stick, indicating shifted walls.
– Cracks in ceiling plaster that follow a straight line.
Your roof should not look like a gentle hill. In South Africa, heavy rains expose these weaknesses quickly. A sagging roof sheet can tear free, turning a small leak into a costly disaster. Do not wait for the ceiling to join the conversation.
Persistent Leaks That Reappear After DIY Repairs
You’ve patched the same spot twice. Yet water still finds its way in. Persistent leaks after DIY repairs signal a deeper problem. Your roof sheets leek for reasons beyond a loose screw or a cracked seal. When the same area fails repeatedly, or new stains appear far from the original fix, it’s time to call a professional. They can trace the true source, which often lies beneath the surface. Safety matters too: working on a damaged roof carries risks. If you notice sagging, visible daylight through gaps, or water pooling after every storm, stop patching. A professional roofer in South Africa will assess the entire system and provide a lasting solution.
Large Areas of Rust Spreading Across Multiple Sheets
When rust spreads across multiple sheets at once, you are no longer dealing with a simple repair. The structural integrity of the entire roof is compromised. A localised patch might stop one drip, but it will not save the neighbouring sheets that are already thinning and flaking. This is the moment to call a professional, before the roof sheets leek in places you cannot see from the ground.
Professionals measure the remaining metal thickness and inspect the underlying battens and purlins for hidden damage. They also determine why the corrosion is spreading so rapidly, whether from trapped moisture, poor ventilation, or incompatible metals. Their assessment covers the whole roof system, not just the visible rust.
Safety Concerns When Working on Steep or High Roofs
The true danger of a failing roof often reveals itself only when you are already on top of it. The glossy sheen on a corrugated metal profile becomes a slick hazard after the morning mist, and the pitch of a steep roof transforms a simple inspection into a balancing act. Homeowners in South Africa face a specific risk when they attempt to survey damage on high gables or double-storey buildings without the right equipment.
Professionals operate with harnesses, anchor points, and ladders that are secured to the structure itself. They have the training to assess the wind load on a sheet while standing on it, and they know when a batten will give way underfoot. DIY attempts on these surfaces often lead to serious injury.
– A fall from a single-storey roof can result in fractures.
– Steep pitches require specialised ladder brackets and crawl boards.
– Wet metal surfaces offer zero traction.
The decision to climb is often made out of frustration with a persistent drip. But the cost of a hospital visit outweighs the price of a professional assessment. When the roof sheets leek in a high section, the repair requires moving heavy tools and materials across an unstable surface. A professional is equipped to handle the logistics of a high roofline. They can secure the work zone and access the damaged area without risking their safety or your property. You can see where the water stains appear on the ceiling from the ground, but reaching that exact point on a steep metal slope is a task best left to those with the gear and the experience. This is why the smartest move is to let a trained contractor handle the situation where the roof sheets leak overhead.



0 Comments